by Baron Dunstan M’Lolane

Preface
As my interest in vernacular furniture has grown, so has my curiosity about the processes which went into making household items. What tools were used to shape and join them? What were the materials and how were those materials prepared? What methods of production did cabinetmakers practice? Inspired by the late Jennie Alexander, author of “Make a Chair from a Tree”, and the continuation of her work done in partnership with famed joiner Peter Follansbee, I have been exploring the entire furniture-making process from harvesting trees through the finished piece.
image: British Museum, MS. 18855

Current Work: A Dome-Lidded Ark
Harvesting and processing the wood
This project began in A.S. LIII with the fortuitous opportunity to harvest two Walnut trees from private land. A small group of like-minded individuals were gathered to fell (drop) and buck (cut into manageable pieces) the trees using only axes and handsaws.


Felling and Bucking
We began felling the trees with axes, as I had observed in several illuminated Books of Hours. After the first tree was down, we switched to a whipsaw for the second tree (and also shed our garb) due to the unseasonable warmth of the day and the labor involved.
After bucking the trunks into lengths four of us could lift, we loaded them up and I took them to a local mill.

Sawmills in the Middle Ages
Did sawmills exist in the Middle Ages? Yes, absolutely! The earliest known mills date from the third century BCE. The Romans used them extensively for both lumber and stone-cutting. By the Sixth century CE, mills were widespread across Europe. The image here is Villard de Honnecourt’s sketch of a water-powered sawmill, circa 1235 CE.
Portfolio of Villard de Honnecourt, Bibliothèque nationale de France, MS Fr 19093
Drying
After milling the trunk into rough slabs of three inches thick, I stacked-and-stickered them to dry for the next two years in my lumber drying shed.
During the subsequent years, I began paying closer attention to the profiles of boards used in furniture — especially chest and coffer construction. What I observed is that whereas many pieces were constructed with boards that had faces “trued” to each other (i.e. at 90 degrees to each other), forming boards that are rectangular in cross-section, there also exist extant pieces in which the boards taper towards an edge.
These boards, I have come to learn, were not sawn from a trunk but rather were split or rived from the trunk while the wood was still green (wet).
Splitting the wood in this way precludes the need for a sawmill and is less labor-intensive than sawing the trunk into boards by hand in a sawpit. Interestingly, the extant pieces I have cataloged that were made using split lumber tended to have originated both outside of urban areas and away from rivers (where mills were more likely to have been found).
This suggests to me that split wood construction was more likely to have occurred where access to milled lumber was rare. Later in this paper, I will show my experimentation with splitting boards from off of a trunk, and what I intend to do next in my research.
The Lid
The decision to make a dome-lidded ark came about from having an attractively rounded board atop the pile of boards drying in the shed for the last couple of years. I would see it every once in a while and ask myself “what it wanted to be.” A chance reading of the paper “Medieval Domed Chests in Kent” by Christopher Pickvance (Regional Furniture, issue XXVII, 2012) led to the decision to try my hand at an ark (a dome-lidded coffer or strongbox) small enough to be carried by one person, as this is to be a gift to my friend Dame Cristiana de Huntington.

The slab of Walnut which led to my exploration of dome-lidded coffers. The right half of this slab was used for the lid; the left side was turned into various parts, including the lid end-caps

Planing
I sawed the slab in half, choosing the wider portion for the lid. Then I planed the outside into a gently rounded curve, pleasing to both the eye and hand.


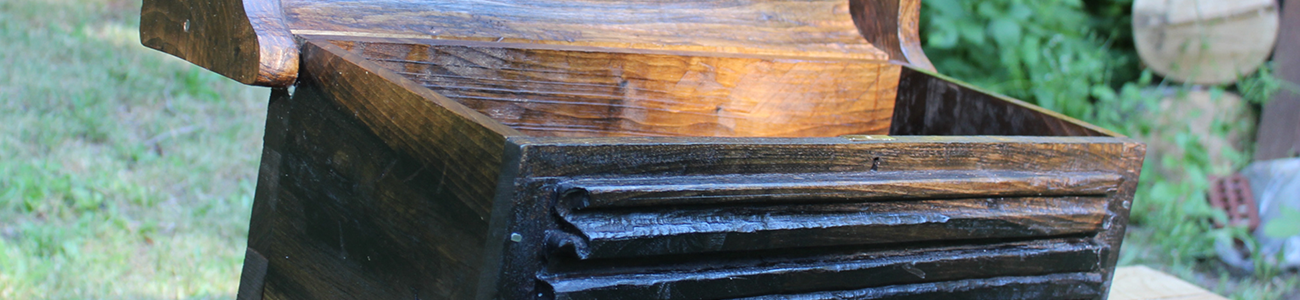
Wasting
After flipping the board over, I wasted-out the underside using a combination of a round moulding plane and a hollow gouge.
I wasn’t sure here if my technique was historically accurate — or even the best way of going about it — until I received unexpected comments from Peter Follansbee (former master cabinetmaker at Colonial Williamsburg) and Thomas Latané (master reproduction cabinetmaker and blacksmith). Both responded to my posts with encouragement and assurance that they had each seen gouge and round plane tool marks on the underside of medieval domed lids. I hope someday to confirm their words with my own eyes.


Lid End Caps
Although the dome is the primary portion of the lid, it also needed two “end-caps” to close off the ends and to form the barrels for the eventual pintel hinges. I sawed the two end caps from the half of the slab that remained after I cut the lid. I began by tracing an outline of the intended hinge onto the board, ripped the board in half, and finalized the shape on both halves. The shape of the end caps was inspired by those on the 13th century Hindringham chest in St. Martin’s church, Hindringham, England.


The Linen-fold Panel
The front of the ark, as most were in period, was a perfect panel for embellishment.
Design
I chose to do a linen-fold design for three reasons:
- Linen-fold was an extremely popular means of embellishing wooden panels in the Late Middle Ages
- I’ve been trying my hand at carving linen-fold recently, and wanted to apply what I had been learning
- The ark will be a gift to someone who is well-known for her research into frilled veils, therefore ornamentation which mimics draped cloth seemed apropos.

Linen-fold panel, detail from Anglo-French coffer, circa 1500-1540, Metropolitan Museum of Art, Cloisters collection.

After I sketched my intended design onto graph paper, I transferred the peaks and valleys onto a panel ripped and flattened from another Walnut slab.
Carving
Then I “raised” the panel by planing down the ends and edges, leaving a raised rectangle dominating the center of the board. I started the trough of each valley with a ripsaw, just enough sawing to leave a straight trough into which a round plane would ride and not meander. The round plane did the vast majority of the wasting and shaping of the valleys and gentle curves.


When the round plane had done all it could do, I switched to a hollow gouge for the fine, rounding work at the tops of the peaks and the bottoms of the valleys. I was careful to undercut the folds to enhance the illusion of rippling cloth. The same hollow gouge was then used at the ends of the panel, relieving the edges into frills and folds.


It was at this point that I had an aesthetic decision to make.
The dark brown splotch of heartwood which I had hoped would enhance the beauty of the linen-fold in actuality I found to be distracting and unappealing. It visually “broke” the clean lines of the carving and was jarring in its contrast to the surrounding sapwood. I let the panel sit for several days as I considered my options.
Option 1: Do nothing. I could just leave it as-is.
Option 2: I could start over with a different board.
Option 3: I could paint the ark (as I have seen many extant examples of late-period boxes) even though linen-fold was not, to our knowledge, painted.
Option 4: I could stain the sapwood to match the heartwood.
Option 5: I could accelerate the wood’s natural aging process.
Aging the Walnut
Ultimately I decided to “age” the wood. Like oak and other tannin-rich woods, walnut reacts to exposure with iron by turning dark brown to black. This is a naturally occurring process and is why very old pieces of furniture have turned “black with age.”
I had been soaking rusted cast iron in water, sealed in a Mason jar, for well over a year. When brushed onto the walnut, this iron-rich water chemically reacted with the natural tannic acid in the wood to become a ferrous tannate complex which then reacted with the oxygen in the air to form a ferric tannate pigment. The results were apparent within five minutes, and I was pleased with how it turned out.
Was this method historically accurate? No. But over time this reaction would have occurred anyway. There are a myriad of ways wood gains exposure to ferrous metals: exposure to iron nails, hinges, and locks, to airborne iron oxide particles, to iron-rich water or blood. Any of these would have inevitably caused this ferric tannate pigmentation. I chose to accelerate the process because this ark was meant to be a gift that I hoped the recipient would find aesthetically pleasing.


The Remainder of the Ark
Body & Pintel Hinge
The rest of the body of the box is unremarkable (two short sides, a bottom, and a back side) except perhaps in that the back board was cut an inch longer than the front panel so that two hinge “pins” could be carved at either end. These pins extend a half-inch out from the short edges of the back board. Holes bored into the end caps slide over the pins, allowing the end caps to rotate around the pins and, thus, the lid to open and close.
The wood for the body came from another slab of the same Walnut tree. Because the slab was about three inches thick, it had to be resawn (sliced) into two thinner boards to be of practical use. Although I have a frame rip saw (identical to the kinds seen in many medieval illuminations), mine requires two people to use. So instead I used a nineteenth-century one-person ripsaw to do the resawing.


Till
I added a small till to the interior of the box. The till is formed of just two thin boards, both cut half an inch longer than the box is deep. One board has two hinge pins carved at the ends; these function just as the ones described above, and allow for the till to have a lid that swings open neatly. The pins fit into holes blind-bored (i.e. not bored all the way through) into the front and back boards.
The other board floats in grooves carved into the front and back boards. One side of the box, the front and back boards, and the bottom of the box form the other three sides and the bottom of the till. I left the till boards unpigmented so that the light-colored till will stand out against the darker wood from which the box is made, making it easier to find the till’s lid in dim light.
Completed Dome-Lidded Ark


Next Project: Making Boards by Hand
Further Research and Experimental Archaeology in Building from Tree to Chest
The Spring of 2021 brought me a timely gift.
A neighbor felled an old-growth big leaf maple in his backyard and offered a section of trunk to me. The log measured over six feet long and was more than thirty inches in diameter. Using published weights-by-volume for maple I estimated the log weighed over 1,800 pounds.
Many, many thanks are due to Lord Connor Maguire and m’lord Oliver King for assisting me using a block-and-tackle to haul the trunk into my yard.

Nearly one ton of fresh Maple delivered neatly and for free to my backyard.

Riving
As mentioned earlier in this paper, I was interested in trying my hand at turning the trunk into boards myself. One way of doing so is to split, or rive, the trunk into long planks. Because of the concentric ring structure of trees, splitting the trunk produces planks that are triangular in cross-section. The planks taper inward toward the heart of the trunk.
Historical Evidence
As far as I have been able to discover, we do not have visual or recorded documentation of how trunks were rived, but we have many extant examples of rived wood, from barrel staves to longships. The tools for riving were easily made and widespread.
Advantages
Riving boards has several advantages. First, it is less labor-intensive to rive trunks into planks than to saw them. Riving splits the wood along the grain, resulting in little waste whereas sawing wood removes material and produces sawdust.
Second, the tools for riving are not specialized. A wooden or metal mallet and wooden (“gluts”) or metal wedges are all that is required. Saws, on the other hand, require skilled manufactury and regular maintenance.
Third, rived planks are stronger than sawn planks, as the grain is preserved as continuous, unbroken fibers.
Fourth, planks of wood species whose xylem vessels have tyloses (i.e. closed cellular structure) remain water-tight if rived. Sawing these woods breaks open the cellular structure, allowing water to flow through the xylem. This makes the wood less suitable for constructing things meant to keep water in (pails, for example) or to keep water out (such as boats).
Method
I began riving the trunk by hewing the bark in a rough line from end to end and snapping a line with the thought of splitting along it. This quickly became irrelevant, as the splitting wood proved to follow the grain, regardless of whether the grain was straight or not.


Then I worked at hammering the first wedge into the end of the trunk. This proved harder than I anticipated, and I experimented with progressively more acute wedge angles until I found one which didn’t merely bounce out of the wood.
Eventually, I settled on starting the split by pounding a hand axe into the wood and, once a split had started, I worked a more obtuse wedge into the split to widen and lengthen it.


As each wedge was pounded in, the split lengthened up the trunk. Having only a few steel wedges on hand, I began to make additional wooden ones, called “gluts”, out of oak and hickory. Using scrap wood, I made gluts up to two feet long and four inches wide, which helped considerably as the split deepened. They did have the drawback, however, of eventually cracking and shattering under the mallet blows.


Crack, Boom, Pop
As the splitting progressed, I heard deep, percussive, cracking noises –like sudden gunshots– occasionally coming from within the trunk. I braced one side of the trunk with heavy debris and stood behind the braced side, lest the trunk suddenly fall in half and crush my legs.
When the trunk finally did open up, several strands of fibers –as thick as my arm– kept the unbraced half from fully falling away. I chopped them with a T-headed hand axe and quickly got out of the way as that half rolled free.
This was the biggest split in the project, of course, because it passed through the entire diameter of the trunk. Subsequent splits formed planks which were no wider than the radius –from the center of the trunk out to one side. As stated previously, these planks are triangular in cross-section: narrow at the heartwood, widening towards the sapwood.


In all, I was able to able to split twelve usable planks and a six inch thick heartwood beam from half of the trunk. The other half is being saved for another future project. The planks and beam are all about six feet long. I oiled the ends (to reduce cracking) and have stacked them out of the weather to begin drying while I finished the ark and this paper.
What’s next?
After Athenaeum, my plan is to plane the planks to a more uniform thickness and rive the beam square. Then I will begin my next project: a full-size dome-lidded, clamp-front chest such as the 16th century Welsh chest pictured below.

16th century Welsh clamp-front chest 
Images courtesy of the British Antique Dealers Association
Acknowledgements
This work would not have been possible without the support and guidance of Countess Elisabeth de Rossignol, OL, and the encouragement of Dame Brighid Ross, OP, and Sir Richard FitzAlan. I owe debts of gratitude to Lord Connor Maguire and m’lord Oliver King for their labor assistance, and to my family for their unwavering support.
The linen-fold carved ark project was inspired by Dame Cristiana de Huntington, who I remember fondly as the competitor to whom I came in second place to (in a field of two) in my first Arts & Sciences competition.
This paper, as are all of my works, is dedicated to my Inspiration, the Honorable Lady Thalia de Maccuswell. What truth and beauty you have seen here is due to her. Any mistakes or errors are my own.
Wow! This is great – I really enjoyed reading through your entire process. Your work is fantastic, thank you for sharing!
As ever, a thoughtful and engaging combination of experimental archaeology and craftsmanship. I look forward to hearing aaaalll about it. 🙂
Thank you, Your Excellency. I look forward to telling you all about it (hopefully in person with a wee glass of port at hand).
Very interesting project. The coffer is wonderful. I’m quite interested in riving wood, as NW Coast Indigenous people did that as the way they got cedar planks, with nephrite adzes and wooden wedges (gluts). Great work.
Thank you! I find NW coastal woodworking fascinating as well, although I would never attempt to imitate it –just appreciate it. I’m already working on the riven wood clamp-front chest I mentioned in my Exhibit, and will be posting images to my blog in the near future.
major kudos for the use of period tools
Thank you Sir!
Good research, good use of period style tools and techniques to make a lovely chest. Well done, my friend, well done.
Thank you, my friend! This was a fun project and I’m glad it turned out well.
Impressive research, use of period style tools and techniques to make a lovely chest. Well done my friend, well done
This is really neat! I enjoy watching the learning process between reconstruction and experimental archaeology and the outcome is beautiful.
Thank you Ciar! I’m eager to get started on the next phase: using the boards I made to reproduce a chest-type that was very common, but not well known these days.
Beautiful work on the coffer. That linen fold is a true thing of beauty. Your work harvesting trees parallels some of my own. Mine is on a much smaller scale, however. How do you plan to get the triangle cross section maple boards to be flat and of even thickness?
Thank you! This was a lot of fun and I am pleased with how the linenfold turned out. A few of the boards I will leave triangular, and “lap” them to make the sides of a chest (similar to how lap-strake boats are sided). Others I will plane until there’s a good, wide, evenly-thick board; I can waste off bits which are too thin.
What a gorgeous, thoughtful, and most excellent gift!
Your iron stain uses the same process as my “vinegaroon” leather dye. That’s so cool!
Thank you very much! I think the recipient will like it. Yes, the process is the same as yours. You were the person to introduce the term “vinegaroon” to me. 🙂