The Earl’s New Clothes, aka 12th Night Clothes Done Early

Previously made cloak that matched 
Mid-poofy pants construction 
Finished pants and purchased tights 
Bought shirt with lace I sewed on 
Jerkin prior to buttons and trim. 
First time trying on jerkin with buttons. 
Close up on trim used on jerkin. 
Stones, beads and pearls used to decorate hat trim. 
Trim for hat 
Finished hat with beaded trim. 
Order of the Garter medallion for Renn Faire, not worn in SCA 
Previously made purse that match 
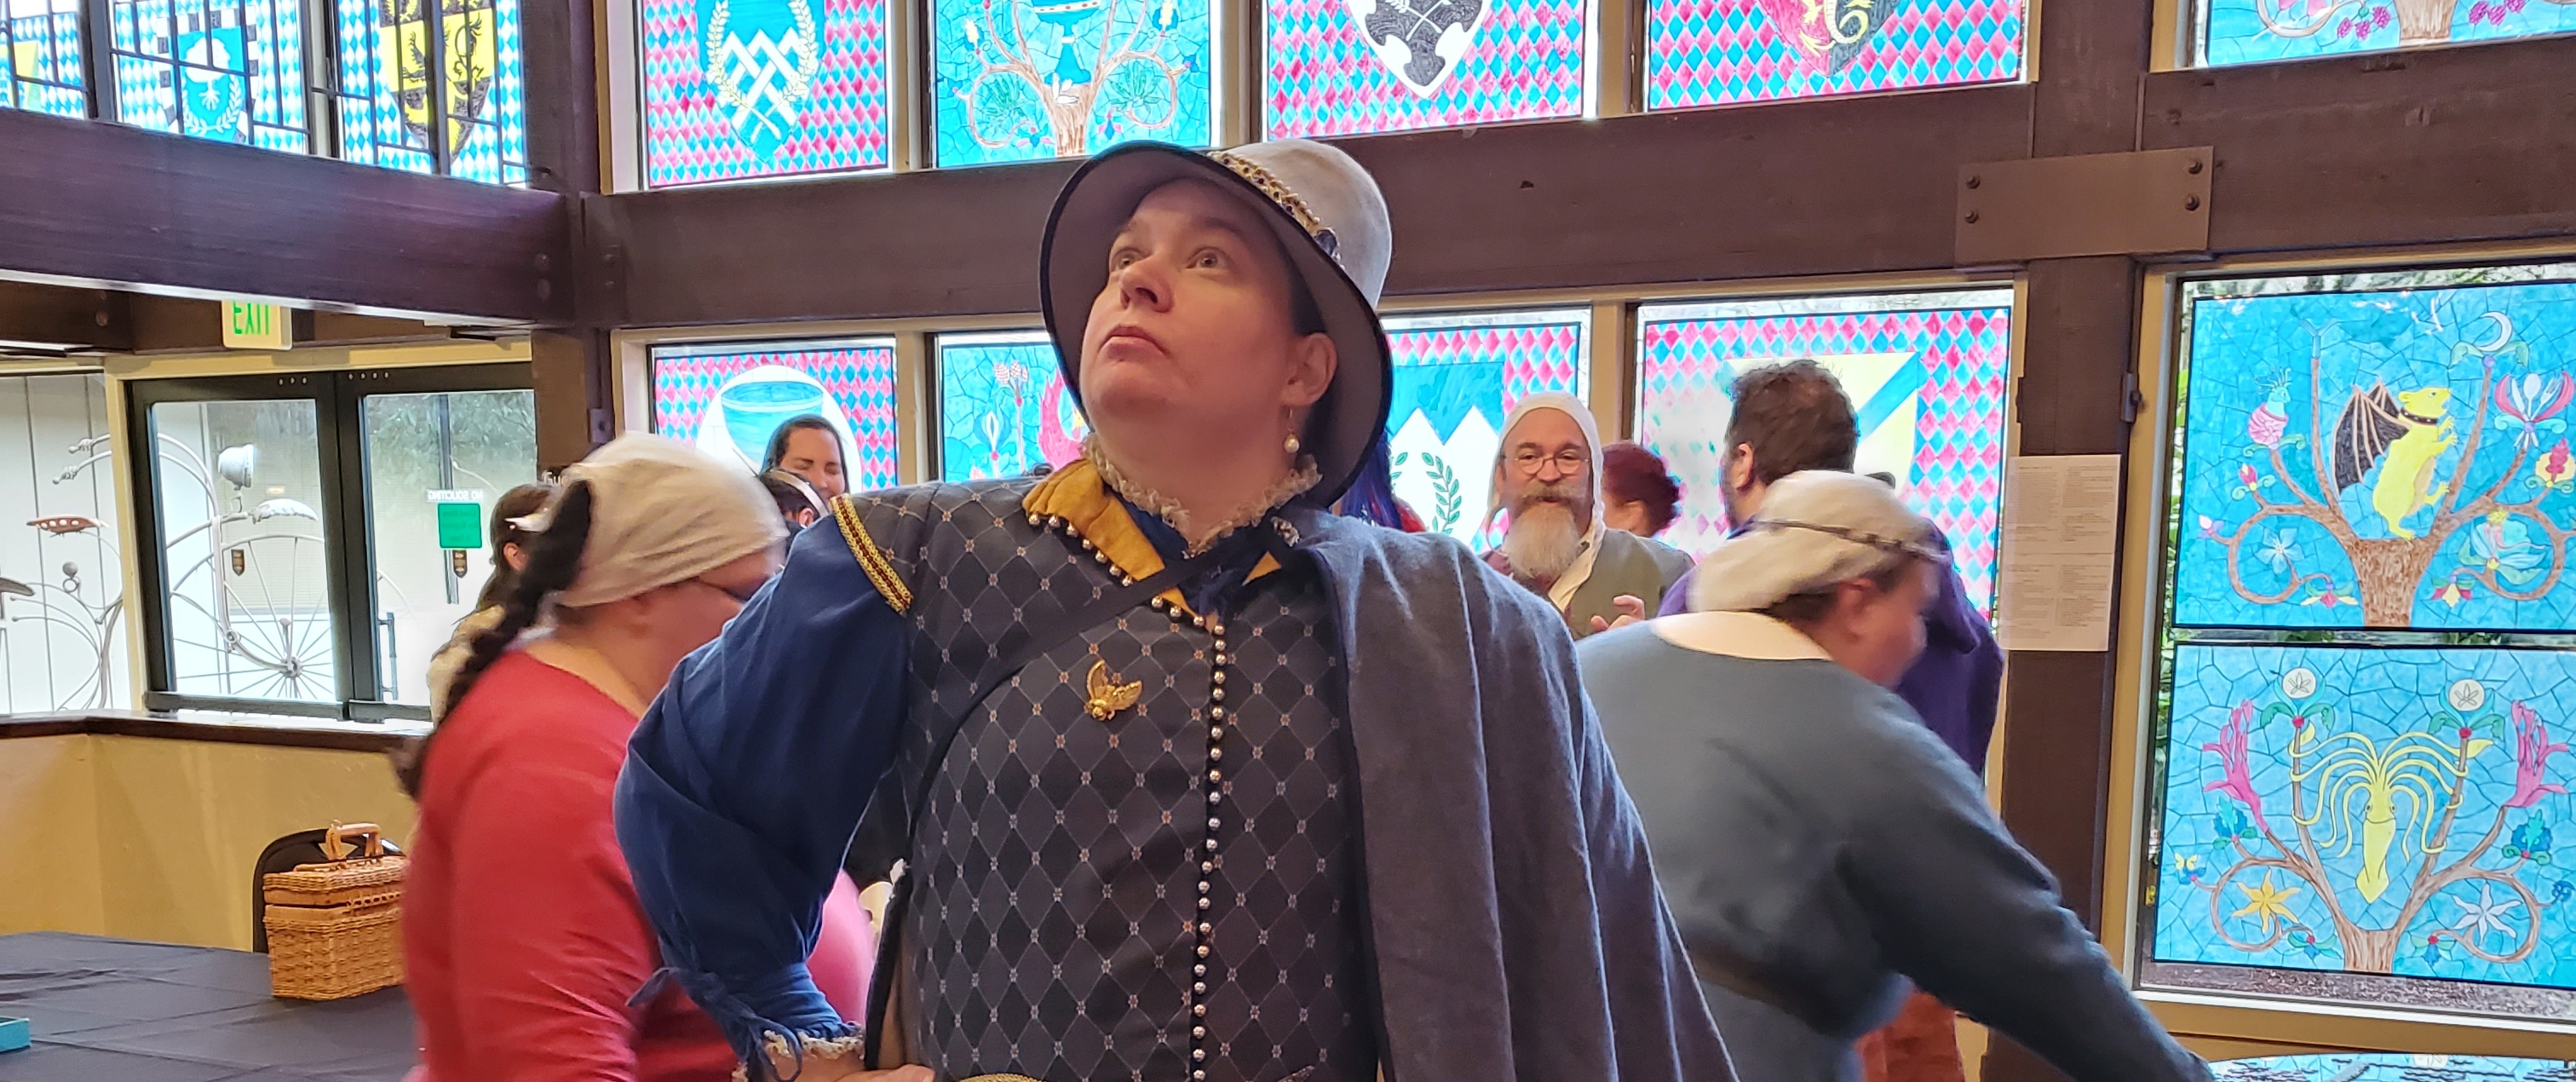
My garb being worn at 12th Night 2020 in Adiantum.
Planning
Last June (2019) I was asked if I wanted to be a noble for the Shrewsbury Renaissance Faire. I agreed, and had about 3 months to put something together that would look fancy and be what we call perioid. There was an initial brain freak out, but I have lots of fabric stashed, and got the approval that I could dress male, which would definitely take less time to create something passable. I made choices based on what I could do in that time that didn’t involve spending too much extra money, and would be suitable to wear in a hayfield where temperatures are often about 90 F. I also decided that since we were dressing as real people for the faire, I would portray Sir Henry Herbert, 2nd Earl of Pembroke, and Lord President of Wales. This is reflected in some of the accessories that get worn for faire but not for SCA events.
Budget
In the end, most of the money spent was on the shirt (vendor at Canterbury Renaissance Faire) and tights (seamlyne.com), which were bought to save time for that initial garb debut, and the trim and beadwork. I believe the only fabric I had to purchase was some duck cloth that is used on the backside of the gold panels of the pants as well as the netting used to stuff the pants.
Patterns
I initially used a pattern from Period Patterns to make a mock up, but discovered that was not the right shape I wanted. Luckily a friend was wanting to offload several old Margo Anderson patterns, and the men’s pants were similar to what I wanted to make. I figured the shorter poofy pants and sleeveless jerkin with breathable shirt and tights would help me handle the heat.
Process
Pants
I started first on the pants and made a mock up. I thought it fit pretty well, so I got started with the actual pants. In reality, my hips to waist ratio was not quite what I cut out so I ended up folding the fly opening inward when applying bias tape. I’ve also nipped in the waist further since then, as I lost inches from going to the gym. The pants are made of synthetic taffeta and duck cloth, with large metal eyelet closures and modern bias tape. They are stuffed with 12 yards of mesh tulle.
Jerkin
The jerkin pattern was altered, in that I drew a line on the pattern from the size of bust I am (measured with compressing sports bra on) to my waist size, as that’s not the same pattern size. I also had to add 2 inches in length. Both the pants and jerkin are a mix of machine and hand sewing, and I was glad I did the armholes by hand because although I have wide shoulders for a female, I still ended up adjusting the shoulder area to be narrower. I didn’t add trim until after sewing pieces afterwards, mostly because I wanted to make sure I had time to finish sewing it. I also didn’t have quite the wiggle room I thought for button holes and the Tudor rose buttons I’d purchased. So I bought stretchy elastic buttonhole trim and added on 37 round buttons, which took less time than you’d think. Apparently it looks more amazing then what I had planned originally.
Accessories
I bartered for the hat from Tabby’s Hats and spent about 6 hours sewing on stones, beads and pearls to the trim until I felt it was “blingy” enough. I chose jewelry that I thought looked not too modern but matched in color scheme and added a few pewter things that would be appropriate for my persona’s status. Throughout the whole outfit I made a conscious decision to have the accessories be the most decorated, and be less ostentatious on the clothes because they weren’t fancy court clothes and I wanted them to be easily cleaned. I expected them to get pretty dusty. In reality, only the tights got bad, but you never know. I also had a pre-existing cloak that matched well and came in handy during rain to prevent damage.
You can find more information about where things were purchased at https://dragondyeworks.wordpress.com/2019/10/08/the-earls-new-clothes/
Next Steps
- Obviously this outfit is rushed, and there are many things I would do differently, such as sew more trim to the jerkin prior to sewing the pieces together and do period appropriate pad stitching instead of interfacing inside the jerkin layers.
- I would like to do another version in period appropriate material for SCA events.
- I also would like to spend more time looking at how the styles have changed and pin down what is the appropriate shape for l589 (when our faire takes place).
- I would love to spend time experimenting with doing silk slashing, and with making thread covered wooden buttons.
- I’m also hoping to make a more period appropriate matching lady’s outfit for my sister rather than the haphazard things we did to make her civil war skirt and basic faire bodice look “fancy noble lady” to the paying faire patrons, who still thought we looked awesome anyway.
Citations
- Arnold, J. (2002). Patterns of Fashion: The Cut and Construction of Clothes for Men and Women, C1560-1620. London: Macmillan.
- Margo’s Patterns – Elizabethan Doublet
- Margo’s Patterns – Elizabethan Gentleman’s Slops
- Mikhaila, N., Malcolm-Davies, J., Johnson, C., & Perry, M. (2006). The Tudor tailor: Reconstructing 16th-century dress. Hollywood, Calif: Costume and Fashion Press.
- https://en.wikipedia.org/wiki/Henry_Herbert,_2nd_Earl_of_Pembroke
A Sampling of Hand-bound Books

First book, Winter 2013 
Attempting the shape of the Codex Rotundus with some friends 
My first paid commission 
First tri-color cover, for Mistress Aelfgifu 
Vigil books for Eoghan, Lissette and Finn 
First attempt at bare board cover, for Mistress Aelfgifu 
I finally made a book for me to use! Slytherin, of course
Planning
Just about all the books I do are made with a purpose in mind. That purpose can be because I want to see how certain leathers and decorations look together, but more often it’s because I’m making a book for a particular person. I first made a book in 2013 but it wasn’t until 2014 that I moved to Portland and apprenticed to Master Sven. He likes to make book covers with all sorts of stuff, both period and modern so we fit well. Currently my books feature modern decorations, that fit the personality or the heraldry of the person I am giving them to, or I make them generic if it’s a prize. In 2017, I set a goal to make at least a dozen books in order to get better at the technique, and I certainly can see improvement. I had a list of people I wanted to gift these books to, and chose leather colors and decorations accordingly. Most of these books can be found at https://dragondyeworks.wordpress.com/2018/03/28/photo-dump-all-the-books/.
Materials
I like to use Southworth Parchment paper in Ivory for most of my books because it’s archival, and it’s got a lovely textured print to the page that makes it interesting. I use archival materials because I want my book to last. I used linen thread and macrame cordage (admittedly from Michaels, but it does the job well) for holding the pages together. Book boards are usually poplar or white oak, both from Lowe’s. I do my best to pick quarter sawn. I have a lot of colors of motorcycle leather from Oregon Leather Co. because 1) you can buy partial amounts of hides and 2) lots of colors available. The metal decorative pieces are sourced from lots of Etsy vendors and the occasional thrift store find. I use PVA glue from Blick Arts.
Process
There are many ways of putting books together throughout history, but I’ve been mostly sticking to the way I was taught by Sven because it’s what I know best.
- Sew the pages together onto the cords, apply glue to a rounded spine.
- Drill holes and channels in the book boards, and attach to pages using glue in the channels along the boards.
- Glue on leather and put in book press to dry.
- Drill holes and attach decorative metal with small nails.
- Glue in pretty end paper to insides of covers.
- Write “created by __me__” in the back!
Next Steps
- Make a book with all period hand tools instead of power tools (this would likely involve finding fresh green wood instead of cured wood, because power tools are easier for cured wood)
- Research more about what period glues are for what step of the process
- Learn to make my own decorative bits including corners and hinges
- Have a better grasp about what styles are for what time/place. I have the resource book, I just have to make the time to read and absorb the information
Citations
- Banister, M. (1993). The Craft of Bookbinding. New York: Dover Publications.
- Cockerell, D. (1901). The Artistic Crafts Series of Technical Handbooks. No. 1 Bookbinding, and the Care of Books. Ed. W. R. Lethaby. New York: D. Appleton.
- Diehl, E. (1980). Bookbinding, Its Background and Technique. New York: Dover Publications.
- Diringer, D. (1982). The Book before Printing: Ancient, Medieval and Oriental, New York: Dover Publications, p. 166.
- Gatke, S. (2001). As Master Sven Odin-eye. Basic Medieval Bookbinding. Unpublished Handout.
- Hulan, N. (2007). As Lady Aneira Gwilt. Beginning Bookbinding. Accessed 9 Dec 2013. http://www.aneira.org/Beginning_Bookbinding.pdf .
- Jutzi, K. (2013) Medieval Manuscripts: Bookbinding Terms, Materials, Methods and Models. Special Collection Conservation Unit of the Preservation Department of Yale U Library. http://travelingscriptorium.library.yale.edu/2013/07/17/bookbinding-terms-materials-methods-and-models/
- Lhotka, E.R. (2000). ABC of Leather Bookbinding: A Manual for Traditional Craftsmanship. Newcastle, DE: Oak Knoll Press.
- Szirmai, J.A. (1992). “Carolingian Bindings in the Abbey Library of St. Gall.” S.l.: S.n.,
- In: Brownrigg, L.L. (1995). Making the Medieval Book: Techniques of Production Proceedings of the 4. Conference of the Seminar in the History of the Book to 1500. Oxford, July 1992. Los Altos Hills, CA: Anderson-Lovelace, p. 157-179.
- Szirmai, J.A. (1999). The Archaeology of Medieval Bookbinding. Aldershot, Hants.: Ashgate.
- Tallet, P. (2000). Ayn Sukhna and Wadi el-Jarf: Two newly discovered pharaonic harbours on the Suez Gulf. British Museum Studies in Ancient Egypt and Sudan. 18: 147–68.
- Tymms, W.R. & M.D. Wyatt. (1987). The Art of Illuminating as Practised in Europe from the Earliest Times, Illus. by Borders, Initial Letters and Alphabets. Sel. and Chromolithographed by W.R. Tymms. London: Studio Editions.
- Watson, A.A. (1996). Hand Bookbinding, a Manual of Instruction. New York: Dover Publications.
Knitting A Flat Cap

In the midst of knitting and cursing the color black 
Fully knitted, but not felted 
Felted and trimmed of fuzz (color distortion is from light)
Planning
I do a lot of knitting, but very little of it can be consider SCA appropriate. I wanted to change this, and I wanted to knit a Tudor flat cap rather than sew one as I had done in the past. There is a good pattern on Ravelry by Sally Pointer called Tudor Cap (https://www.ravelry.com/patterns/library/tudor-cap-2). I chose this pattern because flat caps are fulled and I didn’t have good experience with trying to compensate for the amount of fulling and shrinkage that would occur in such a project. For definition, felting happens to fibers, fulling happens to cloth (woven or knitted), but they are essentially the same thing. People will often refer to fulled knitwear as felted.
Much more planning went into this hat then was necessary. Initially, this was to be the first of two hats. The first was to be a practice run for a second hat. that would be made with hand spun yarn from a sheep breed as close to what would found in Shrewsbury, Shropshire, England in the 1580s, in a color that would go well with my brown garb for that time period. It turns out, the sheep breeds have changed a lot. One of the breeds that would have been available, Ryeland, resists felting. But does that mean it would resist fulling when knitted? Other breeds seem to have simply disappeared or evolved into the breeds we know today that show up in the 1800s.
There has been research by the gals from the Tudor Tailor attempting to figure out what sheep breeds were used in flat caps. They have created and crowd sourcing knitting samples from different breeds and to full and compare to the 100 or so extant ones that exist in five different styles. Extant caps vary wildly in gauge (number of stitches across a row per inch, and rows per inch vertically) and it should be noted that some caps were lined.
Materials
For this hat I chose Lettilopi by Istex in black because it’s a good neutral color that would work with several outfits, and it was a feltable yarn of the right size (Aran weight). It was also available locally so if I ran out, I could get more. It comes in 50 grams balls and I end up using 104 grams. I used a combination of size 8 circular needles and double pointed needles because of what I’m most comfortable with. I’m not entirely sure how it would have been done in period, but circular needles didn’t exist. I suspect it would have been a lot more double points than are normally sold in a pack now. There are some knitters that still do it this way, because that’s how they were taught originally.
Process
Knitting
Despite the fact the yardage was only 227.5 yards, the project seemed to take forever. I blame the fact that the yarn was black. Black yarn is always an eyestrain, and it’s harder to see individual stitches. About halfway through this project, I already decided it would be a lot time until I made another one.
Fulling
In order to felt or full a wool item, you need three things: soap, heat and agitation. In period, the fulling of the hat was done in a variety of ways depending on the resources. Early fullers pounded with their feet, whereas later fulling mills used large wooden hammers driven by water power. Agents such as fuller’s earth, soapwort or urine was added. After fulling, they would have used the dried flower heads of Dipsacus fullonum var. sativus (aka wild thistle or teasel) to nap the cloth. The idea was to make a product that was like velvet in feel but a lot cheaper to produce.
I was going to attempt to do a lot of hand agitation in the sink and then raise the nap with a dog brush (which has similar hooks), but that summer I was dealing with a lot of hand pain and it got the best of me. In the end, I cheated and tossed it through the washer and dryer several times and then used a small pair of scissors to trim the fluff down. It’s not the texture of what was period, I suspect, but it looks alright. I’ve had conversations with people in which they thought I’d actually knit lots and lots of tiny stitches, not something bigger. It also shrank a lot in size and actually fits perched on my head on top of a handkerchief or linen coif, so I’m pleased with how it turned out.
Next Steps
- Find out if the Tudor Tailor ladies have a better idea of what breed would be used
- Make another one, even if it’s commercial yarn, because I keep borrowing this one to my sister
- Contemplate period knitted hose (sooo time consuming)
- I’m currently working on the first steps of a very long planned out knitting project that involves making a Sion relic bag with tiny tiny stitches. The first step? I’m growing a white mulberry tree! Ask me about it if you want to know more.
- Purchase Archaeological Textiles Review, 60 as it’s only about $40 and all about knitted items
Citations
- Ekarius, C., & D. Robson. (2011). Fleece & fiber Sourcebook: more than 200 fibers from animal to spun yarn. North Adams, MA: Storey Publishing.
- https://kemeresearch.com/
- Malcolm-Davies, J. (2018). Finding a Fitting Fleece for Fulling. PieceWork, (Fall), 36-45.
- https://www.ravelry.com/patterns/library/tudor-cap-2
A Collaborative Project for 12th Night

Bottom half sewn 
Finishing sewing the bottom 
After stamping 
After staining and sealing 
Starting the tablet 
Experimenting with wax pouring 
Finished bag and wax tablet (with bone stylus)
Planning
In 2019, at 12th Night (which was local to me that year) there was a call for items that had been made by two or more people for a collaborative Arts & Sciences display. I talked with my apprentice sister Thorny (Cat Cannon) and we decided to create a wax tablet with a bone stylus and a leather carry bag. We decided it would be a joint Christmas present to our Laurel Dame Ælfgifu verch Morgan, as she had talked about wanting a wax tablet. I’d been interesting in attempting to make this style of bag for a while and it made sense to make it to hold a particular item. My main interest in learning about leather stamping is so that some day I can make a handmade book with a tooled cover.
Thorny carved the wax tablet, I shaped the stylus and formed the bag, and we both applied the beeswax to the tablet. We consulted with the other on choosing materials for our own parts so that we were both aware of all parts of the process. We used hand tools in all ways that we could, particularly in the wood part of the project. The only equipment powered by electricity was the stove used to melt the wax, for safety and ease of use.
Materials for Leather Bag
I already had various veg tan leather pieces, and knew that was the best leather for tooling. I haven’t done much tooling at all, in terms of actual finished projects, but I had been putzing around with practicing on scrap leather. For several years, Tandy has had some rather good sales at Christmas time on stamps and my great-aunt also passed along what she had when she found out I was interested in taking up leatherworking.
I also went in and asked the people at Tandy about various leather stains (Eco-flo leather dye and antique gel) and sealing liquids (Eco-flo satin shene). It’s obviously not period but as most of them are water based, it’s a lot more easy to clean up. Other things used were various needles and thread, leather punches to create the sewing holes and contact cement. In retrospect, this was a bad idea, I even owned a better alternative. But I didn’t know that Old Brown Glue (a shelf stable alternative to hide glue) worked well on leather as well as wood. I was simply following the mistake someone else had done in the blog post I read.
Materials for Tablet and Stylus
The tablet is made from basswood, which we chose together on a group shopping trip based on ease of carving and the fact that it was affordable and available. Basswood is a new world wood, however it has similar properties to materials used to make extant writing tablets such as boxwood. This is research Thorny (Catherine Cannon) did so I can’t speak to it.
The wax inside the tablet is beeswax mixed with carmine and lamp-black pigments (one on each side). Initially we thought the red must be from ground cochineal, but we were told by someone in the SCA with more experience that it would end up more pink. Beeswax was used in at least one extant tablet, however, not being keen on the idea of working with arsenic, we chose not to add orpiment as was done to the original. We mixed the red before the black in case we couldn’t fully clean our equipment.
Wax tablet styli were either made of metal or bone. Knowing our intended recipient…we went with bone, specifically a baculum. That’s a penis bone for you non-science folks.
Process
Leather Bag Construction
As you can see from the pictures above, I had an inner and outer layer on the bottom half, one layer on the top and a lot of sewing. The contact glue was used to adhere the two bottom half layers together. I’ve since learned that a better way would be to use more layers that are thinner, and only sew the innermost layer, gluing the rest. The blog posts I read about construction had one person stamping and then sewing, and the other doing the reverse. I sewed the layers together, stamped the design with a oak block inside the bag and then stained the bag. You can see in the pictures where the contact cement leaked to a place that was visible.
Wax Tablet Construction
The tablet’s hinges were placed very close to the edge so as to make the waxed area evenly spaced within the tablet, however after drilling the holes, we realized this is not an ideal placement as the hinge area receives a lot of stress when being used. Next time, the hinges should be moved further away from the edge in order to make the whole item sturdier. This may explain some initial splintering. We chose the rounded style to make the tablet look more interesting. It resembles one in the Metropolitan Museum of Art’s collection, though we did not have the skill to do the hand carving that decorated the outside of that one.
Adding Wax to the Tablet
On the right side of the tablet (the red wax) we attempted to pour the wax in using a small ladle. This did not work very well as you may be able to see. We attempted various methods to smooth the wax after the fact, none of which worked particularly well. When we moved on to the black on the left side, we used a small paper cup. We poured all the wax into the cup and then poured the wax in slowly, tilting the tablet to spread it as needed.
The paper cup had a minimal coating of its own, so we figured the wax wouldn’t burn through the paper and if any cup wax melted, it wouldn’t alter our wax much. This turned out to be a much better plan. It seems that the best way to pour the wax into the well in the tablet is all at once, and as quickly as possible. We theorized that likely these were done in batches in a work shop with a larger wax pot and a larger ladle with people who did this a lot more often then we have.
The Bone Stylus
The bone stylus was a simple matter of sanding a taper on one end and a flat end on the other. Initial testing made us realize that the bone needed to be sealed to avoid staining. We weren’t sure of a period way to do this and ran out of time to find out.
Next Steps
- More practice tooling
- Actually use the non-period leather paints I got six months ago
- Create another bag with more layers, in which the tooling is just a separate piece glued on at the end
- Stain before sewing and gluing
- Get a bigger metal spoon for wax pouring
Citations
- British Museum. Cuir-bouilli case, Italian, 16th Century. https://www.britishmuseum.org/research/collection_online/collection_object_details.aspx?objectId=39493&partId=1.
- British Museum. Molded leather book case, Italian, 14th Century. https://www.britishmuseum.org/research/collection_online/collection_object_details.aspx?objectId=50270&partId=1.
- Howard, M. 1955, published electronically August 2014. Technical Description of the Ivory Writing-Boards from Nimrud. Journal “Iraq”, vol. 17, p.14. https://www.cambridge.org/core/journals/iraq/article/technical-description-of-the-ivory-writing-boards-from-nimrud/ADAC1E9768901305983288D6DB5A9AB6
- Katafalk. 2013. Leather Case. https://katafalk.wordpress.com/2013/09/15/leather-case/
- Leonida, M. 2016. Middle Age Geanta XIV. http://marianleonida.blogspot.com/2016/12/geanta-medievala-medieval-belt.html
- Met Museum. Boxwood writing tablet, British, 14th century. https://www.metmuseum.org/art/collection/search/471852.
- Muimnech, C. (date unknown). Making a Stamped Leather Case. http://coblaith.net/PeriodPresents/SewingKit/leathercase.html.
An Attempt at Period Wool Combs

Tools 
Carving the comb 
Comb with holes 
Finished combs
Planning
I have at some point experienced nearly all aspects of the process of sheep’s wool to a knitted project. Some of these I liked better than others. I’ve used both wool combs and wool carding paddles (that which resemble dog brushes) and I prefer the wool combs. Unfortunately, to purchase a pair is $80-$200, depending on style and materials. I already had most of the tools I would need and there was an upcoming A&S contest (Three Mountains) where the previous champion wanted people to do a craft new to them.
Unfortunately I didn’t look at pictures of extent samples until after it’s creation (I acquired a good book about it afterwards). So I didn’t know that the single pieced combs (Anglo-Saxon style) had two rows of tines, and the combs with one row of tines (Norse style) was made from two pieces of wood (head and shaft) put together. The Orkney and Shetland Isles have yielded some made of horn, probably because wood was scarce. I made some inferences on wood types used based on what was prevalent in the area.
Unfortunately Scots Pine and Norway Spruce are not usually things found in the lumber yard in small pieces. When I initially went shopping for this project, I went to Home Depot and their choices in thin hobby lumber are red oak and poplar. Lowe’s only sells white oak and poplar. Norway spruce has a Janka value of 380 lbf, whereas Scots pine’s value is 540lbf. White oak has a value of 1350 lbf. Poplar has a value of 540 lbf, which would make it the obvious choice. The Janka value of a wood species is a toughness value based on the force required to embed an 11.28 diameter steel ball into the wood sample.
Process
Materials
All wood purchased has been dried and cured because people work mainly with power tools now, which would jam with green wood. Finding green wood is not impossible, it would just involve more legwork then I had time for. In period, I also would likely be sourcing it directly from the individual on whose property it is growing.
There was initially an attempt at making the combs out of red oak with power tools. Alas I drilled the tine holes too big and used glue. Gorilla glue was not the correct glue and it looked horrific. I also tried to hand carve red oak, and failed spectacularly because of how hard the wood was. The poplar was doable, though it would have been easier if the wood had been fresh.
None of the hand tools used are exactly period, after all were machine made and bought at local stores or from artisans using modern tools. But they do resemble tools of the period. the nails used are modern 3” 10 penny nails that are galvanized steel and have been coated to slide into place easier. To make them more period, a friend helped me blunt their tips and then I used a power tool to cut the nail heads off (easier and safer than with hand tools) to make the nails flush against the comb head.
Carving the Comb
I cut poplar boards into pieces with a hand saw, lengthening the handle compared to the red oak combs I made previously. I then put them one at a time in the vise grip end of my workbench and used a draw knife (double handled bladed implement) and a small paring knife to carve the wood. The draw knife was good for long cuts whereas I used the pairing knifes to round the edges and remove small pieces.
Despite having seen a draw knife being used before, I goofed up and used it wrong, working it so I was pushing away with the blade away rather than drawing it towards me, hence its name. To be fair, I’ve had knife safety about “always cut with the blade going away” drilled into me by my parents for over 20 years and that’s all I thought about when I decided to do it that way. It worked okay anyways since the wood was soft, and there was no blood involved.
I attempted this same technique on white oak, but a chisel seemed to work better, to start with. I’ve very little experience with chisels though and I got too enthusiastic and cracked the wood along the grain. I decided to set that aside as an interesting example and go back to the poplar.
Inserting the Nails
Drilling the holes for the nails seemed more problematic. There are a few ways to achieve this without power tools, some of which are in period and some of which are not. I did acquire an eggbeater drill (named because it looks like an old fashion eggbeater with a drill bit instead of beaters), but 1) I couldn’t get it cleaned up and functioning as well as I would like and 2) it is too modern. Another choice would be a chuck brace, which I have since acquired.
Period ways of drilling holes pretty much involve shoving a blade shaped piece of metal into the wood and working it until you get what you want. The most primitive method is a bow drill, and if it looks familiar, that’s because it’s not a lot different than the very traditional way to start a fire through friction.
I went to a friend’s house because I thought he had a hand drill, which he didn’t. In the end, we ended up using a modern drill press and then I hammered the nails into place. They didn’t need any glue. Alas, the tines are a little crooked, but the combs are functional.
Next Steps
- Source hand forged nails, preferably by barter. Someone who made these would not have been the maker of the nails, something we often overlook in projects. I certainly don’t have the room, the skill or the time for a forge
- Acquire a bow drill. I have acquired several hand drills since then, but they are still too modern for the period of this item. This would also be useful for bookbinding.
- If I were to create another set carved by hand I would prefer to find green (uncured) wood in either Norway spruce and Scots pine
- Realistically, if I make another set I will use white oak for strength and power tools because of the toughness of the wood
Citations
- Davenport, E. G. (1953). Your handspinning. Pacific Grove, CA: California: Craft & Hobby Book Service.
- Diehl, D. (1997). Constructing medieval furniture: plans and instructions with historical notes. Mechanicsburg, PA: Stackpole Books.
- Ekarius, C., & D. Robson. (2011). Fleece & fiber Sourcebook: more than 200 fibers from animal to spun yarn. North Adams, MA: Storey Publishing.
- Hall, J. (2010, November 1). Drills and Bits in the Middle Ages. Retrieved November 09, 2017, from http://userblogs.ganoksin.com/primitive/2010/11/01/drills-and-bits-in-the-middle-ages/
- Hall, J. (2010, November 1). Saws in the Medieval Period. Retrieved November 09, 2017, from http://userblogs.ganoksin.com/primitive/2010/11/01/saws-in-the-medieval-period/
- Østergård, E. (2009). Woven into the earth: textiles from Norse Greenland. Aarhus: Aarhus Univ. Press.
- Ottaway, P., & Rogers, N. S. (2002). Craft, industry and everyday life: finds from medieval York. York, UK: Council for British Archaeology.
- Rhoades, C. (2016, December 9). Handcarding with a light touch. Spinning Daily Presents: Wool Combing and Carding, 11-16. doi:https://www.interweave.com/article/spinning/our-new-free-ebook-is-an-ode-to-wool-combing-and-carding/
- Rogers, P. W. (1997). Textile Production at 16-22 Coppergate. York, UK: Council for British Archaeology.
- Russo, R. (2016, December 9). Combing: Organizing fibers to spin. Spinning Daily Presents: Wool Combing and Carding, 2-10. doi:https://www.interweave.com/article/spinning/our-new-free-ebook-is-an-ode-to-wool-combing-and-carding/
You are a person of many talents and thank you for sharing them. I have been working on making books for almost two years now and I can say that yours are amazing and so much more detailed then mine. When you mentioned a reference book were you referring to The Archaeology of Medieval Bookbinding or is there another one?
Yep that’s the one! I do have a few smaller books that mention technique, because it is of course still a trade (though harder to find, and most are people that mainly refurbish old books). But Szirmai is the only author that I know of with a full book on the medieval techniques. There’s various styles with different ways of going around the cords, and different orientations of cords in the book covers. It’s really cool. And I’ve got a few things I want to try as fantasy clasps some day. So many cover ideas…so little desire to fold paper sometimes 😀
I was interested in your knitted flat cap. I haven’t had much luck fulling something I have knit. There must be a way to control the shrinkage. I did purchase a copy of the Archaeological Textiles Review #60 after reading your conclusions.
Having seen what the articles are in ATR #60, I think I need to buy it too. It’s cheaper then I thought and The Tudor Tailor has a copy so maybe I’ll order some other stuff to combine shipping, or see if they’ll send it whenever the Typical Tudor is done.
These are really lovely projects, but I have to say the poofy pants and Tudor knitted-fulled flat cap are my favorites. Poofy pants because the whole ensemble looks great, but the pants really bring home the period for me. …and I can only imagine that the hat must be practically rain-proof. Thank you for sharing!
The hat and cloak did very well in keeping me dry at the renn faire on the second day. Because the cloak stuck out from the body a bit, the pants stayed dry (my main worry). The hat got a little stained from the feathers (now I’ve learned, remove them in rain!). I did have to reblock it with a steamer and a big jar but that was more due to how it got packed wet and a bit smooshed (we were not careful when packing to leave, just loading as fast as possible). My sister wore my black hat that day and it fared well as well. Glad you like my projects!